Overview
So far I have shown you 2d drawing, animation, and hardware accelerated 3d. When you build something with these technologies you may notice something is missing: sound! Traditionally good sound on the web without plugins has varied between horrible and impossible, but that has changed recently thanks to a new sound api called WebAudio.
Note that this API is still in flux, though it's a lot more stable than it used to be. Use WebAudio for experimentation but not in production code, at least not without a fallback to Flash. Try SoundManager2 as a fallback solution.
Audio Element vs WebAudio
You may have heard of something called the Audio element. This is a
new element added to HTML 5 that looks like this <audio
src="music.mp3"/>. The Audio element is great for playing
songs. You just included it in your page the same way you would include an
image. The browser displays it with play controls and you are off and running.
It also has a minimal JavaScript API. Unfortunately the Audio element is really
only good for music playback. You can't easily play short sounds and most
implementations only let you play one sound at a time. More importantly you
can't generate audio on the fly or get access to the sound samples for further
processing. The Audio element is good for what it does: playing music, but it is
very limited.
To address these shortcomings the browser makers have introduced a new spec called the WebAudio API. It defines an entire sound processing API complete with generation, filters, sinks, and sample access. If you want to play background music use the Audio element. If you want more control use the WebAudio API.
The complete WebAudio API is too big to cover in this session so I will just cover the parts that are likely to be of interest to Canvas developers: sound effects and visual processing.
[browser support?]Simple playback
For graphics we use a graphics context. Audio is the same way. we need an audio context. Since the spec isn't a standard yet we have to use the webkitAudioContext(). Be sure to create it after the page has loaded since it may take a while to initialize the sound system.
var ctx; //audio context
var buf; //audio buffer

//init the sound system
function init() {
    console.log("in init");
    try {
        ctx = new webkitAudioContext(); //is there a better API for this?
        loadFile();
    } catch(e) {
        alert('you need webaudio support');
    }
}
window.addEventListener('load',init,false);
Once the context is created we can load a sound. We load sounds just like any other remote resource, using XMLHttpRequest. However we must set the type to 'arraybuffer' rather than text, xml, or JSON. Since JQuery doesn't support 'arraybuffer' yet [is this true?] we have to call the XMLHttpRequest API directly.
//load and decode mp3 file
function loadFile() {
    var req = new XMLHttpRequest();
    req.open("GET","music.mp3",true);
    req.responseType = "arraybuffer";
    req.onload = function() {
        //decode the loaded data
        ctx.decodeAudioData(req.response, function(buffer) {
            buf = buffer;
            play();
        });
    };
    req.send();
}
Once the file is loaded it must be decoded into a raw sound buffer. The code above does this with another callback function. Once decoded we can actually play the sound.
//play the loaded file
function play() {
    //create a source node from the buffer
    var src = ctx.createBufferSource();
    src.buffer = buf;
    //connect to the final output node (the speakers)
    src.connect(ctx.destination);
    //play immediately
    src.noteOn(0);
}
I'm going to walk through this code snippet very carefully because it's important you understand what is going on here.
Everything in WebAudio revolves around the concept of nodes. To
manipulate sound we attach nodes together into a chain or graph then start the
processing. To do simple audio playback we need a source node and a
destination node. ctx.createBufferSource() creates a source
node that we can attach to the audio buffer with our sound.
ctx.destination is a property containing the standard destination
output, which usually means the speakers of the computer. The two nodes are
connected with the connect function. Once connected we can play the
sound by calling noteOn(0) on the source.
WebAudio Nodes
So far we have seen just a source and destination node, but WebAudio has many
other node kinds. To create a drum app you could create multiple source nodes,
one for each drum, connected to a single output using an
AudioChannelMerger. We could also change the gain of each drum
using AudioGainNodes.
More WebAudio nodes:
- JavaScriptAudioNode: direct processing with JavaScript
- BiquadFilterNode: low and high pass filtering.
- DelayNode: introduce temporal delays
- ConvolverNode: realtime linear effects like reverb
- RealtimeAnalyserNode: for sound visualizations
- AudioPannerNode: for manipulating stero, multichannel, and 3D sound
- AudioChannelSplitter and AudioChannelMerger
- Oscillator: for generating waveforms directly
Sound Effects
The regular HTML audio element can be used for sound effects but it's not very good at it. You don't have much control over exactly how and when the audio is played. Some implementations won't even let you play more than one sound at a time. This makes it okay for songs but almost useless for sound effects in a game. The WebAudio API, lets you schedule sound clips to play at precise times and even overlay them.
To play a single sound multiple times we don't have to do anything special; we just create multiple buffer sources. The code below defines a play function which creates a buffer source each time it is called and plays it immediately.
//play the loaded file
function play() {
    //create a source node from the buffer
    var src = ctx.createBufferSource();
    src.buffer = buf;
    //connect to the final output node (the speakers)
    src.connect(ctx.destination);
    //play immediately
    src.noteOn(0);
}
You can try the demo here. Each time you press the button it will play a short laser sound. (courtesy of inferno on freesound.org If you press the button quickly you will hear that sounds stack up and overlap correctly. We don't have to do anything special to make this happen. Web Audio handles it automatically. In a game we could call the play function every time a character fires their gun. If four players fire at the same time the right thing will happen.
We can also create new sounds by purposely overlapping sounds. The noteOn() function takes a timestamp to play the sound, in seconds. To create a new sound we can play the laser clip four times, each time offset by 1/4th of a second. Thus they will overlap cleanly, creating a new effect.
        var time = ctx.currentTime;
        for(var i=0; i<4; i++) {
            var src = ctx.createBufferSource();
            src.buffer = buf;
            //connect to the final output node (the speakers)
            src.connect(ctx.destination);
            //play immediately
            src.noteOn(time+i/4);
        }
Note we have to add the current time from the audio context to the offset to get the final time for each clip.
Try out the final version here
Audio Visualization
What fun is graphics if you can't tie it directly to your audio?! I've always loved sound visualizations. If you have ever used WinAmp or the iTunes visualizer then you are familiar with this.
All visualizers work using essentially the same process: for every frame of the animation they grab a frequency analysis of the currently playing sound, then draw this frequency in some interesting way. The WebAudio API makes this very easy with the RealtimeAnalyserNode.
First we load the audio the same way as before. I've added a few extra variables called fft, samples and setup.
var ctx; //audio context
var buf; //audio buffer
var fft; //fft audio node
var samples = 128;
var setup = false; //indicate if audio is set up yet


//init the sound system
function init() {
    console.log("in init");
    try {
        ctx = new webkitAudioContext(); //is there a better API for this?
        setupCanvas();
        loadFile();
    } catch(e) {
        alert('you need webaudio support' + e);
    }
}
window.addEventListener('load',init,false);

//load the mp3 file
function loadFile() {
    var req = new XMLHttpRequest();
    req.open("GET","music.mp3",true);
    //we can't use jquery because we need the arraybuffer type
    req.responseType = "arraybuffer";
    req.onload = function() {
        //decode the loaded data
        ctx.decodeAudioData(req.response, function(buffer) {
            buf = buffer;
            play();
        });
    };
    req.send();
}
We will play the music as before using a source and destination node, but this time we will put an analyser node in between them.
function play() {
    //create a source node from the buffer
    var src = ctx.createBufferSource();
    src.buffer = buf;

    //create fft
    fft = ctx.createAnalyser();
    fft.fftSize = samples;

    //connect them up into a chain
    src.connect(fft);
    fft.connect(ctx.destination);

    //play immediately
    src.noteOn(0);
    setup = true;
}
Note that the function to create the analysis node is createAnalyser with an 's', not a 'z'. That caught me the first time. (another american vs british english difference?)
I've called the analyser node fft which is short for a Fast Fourier Transform.
A quick diversion into crazy sound math.
If you were to look at the buffer which contains the sound you would see just a bunch of samples, most likely forty four thousand samples per second. They represent discrete amplitude values. To do music visualization we don't want the direct samples but rather the wave forms. When you hear a particular tone what you are really hearing is a bunch of overlapping wave forms chopped up into those amplitude samples over time.
We want a list of frequencies, not amplitudes, so we need a way to convert it. The sound starts in the time domain. A discrete Fourier transform converts from the time domain to the frequency domain. A Fast Fourier Transform, or FFT, is a particular algorithm that can do this conversion very quickly. The math to do this can be tricky but the clever folks on the Chrome Team have already done it for us in the analyzer node. We just have to fetch the final values when we want them.
For a more complete explanation of discrete Fourier Transforms and FFTs please see Wikipedia.
Drawing the Frequencies
Now let's draw something. For this we will go back to what we learned in the animation chapter. Create a canvas, get the context, then call a drawing function for each frame.
var gfx;
function setupCanvas() {
    var canvas = document.getElementById('canvas');
    gfx = canvas.getContext('2d');
    webkitRequestAnimationFrame(update);
}
To get the audio data we need a place to put it. We will use a Uint8Array, which is a new JavaScript type created to support audio and 3d. Rather than a typical JavaScript array which can hold anything, a Uint8Array is specifically designed to hold unsigned eight bit integers, ie: a byte array. JavaScript introduced these new array types to support fast access to binary data like 3D buffers, audio samples, and video frames. To fetch the data we call fft.getByteFrequencyData(data).
function update() {
    webkitRequestAnimationFrame(update);
    if(!setup) return;
    gfx.clearRect(0,0,800,600);
    gfx.fillStyle = 'gray';
    gfx.fillRect(0,0,800,600);

    var data = new Uint8Array(samples);
    fft.getByteFrequencyData(data);
    gfx.fillStyle = 'red';
    for(var i=0; i<data.length; i++) {
        gfx.fillRect(100+i*4,100+256-data[i]*2,3,100);
    }

}
Once we have the data we can draw it. To keep it simple I'm just drawing it as a series of bars where the y position is based on the current value of the sample data. Since we are using a Uint8Array each value will be between 0 and 255, so I've multipled it by two to make the movement bigger. Here's what it looks like:
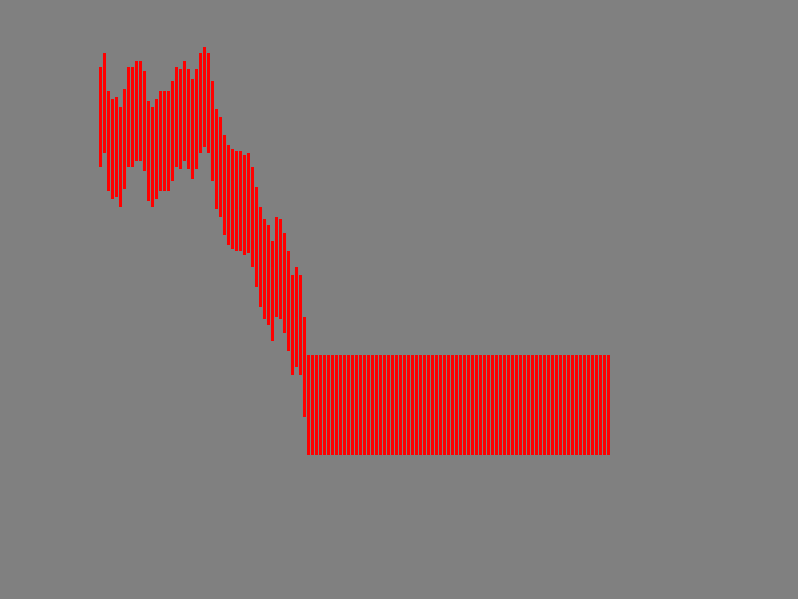
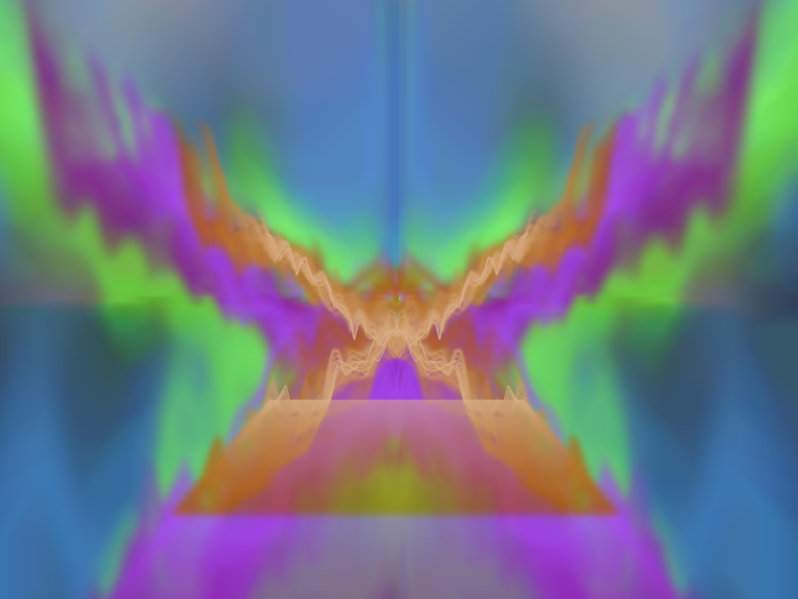
Not bad for a few lines of JavaScript. (I'm not sure yet why the second half is flat. A stero/mono bug perhaps?) Here's a fancier version. The audio code is the same, I just changed how I draw the samples
Next Steps
There is so much more you can do with WebAudio than what I've covered here. First I suggest you go through the HTML5 Rocks tutorials:
Next take a look at 0xFE's Generating Tones with the Web Audio API to learn how to directly generate sound from mathematical waveforms. Also A Web Audio Spectrum Analyzer.
The full (draft) WebAudio specification
In the next chapter we will look at access the user's webcam.