Gameboy Emulator Progress
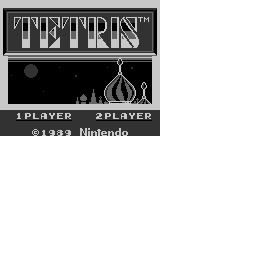
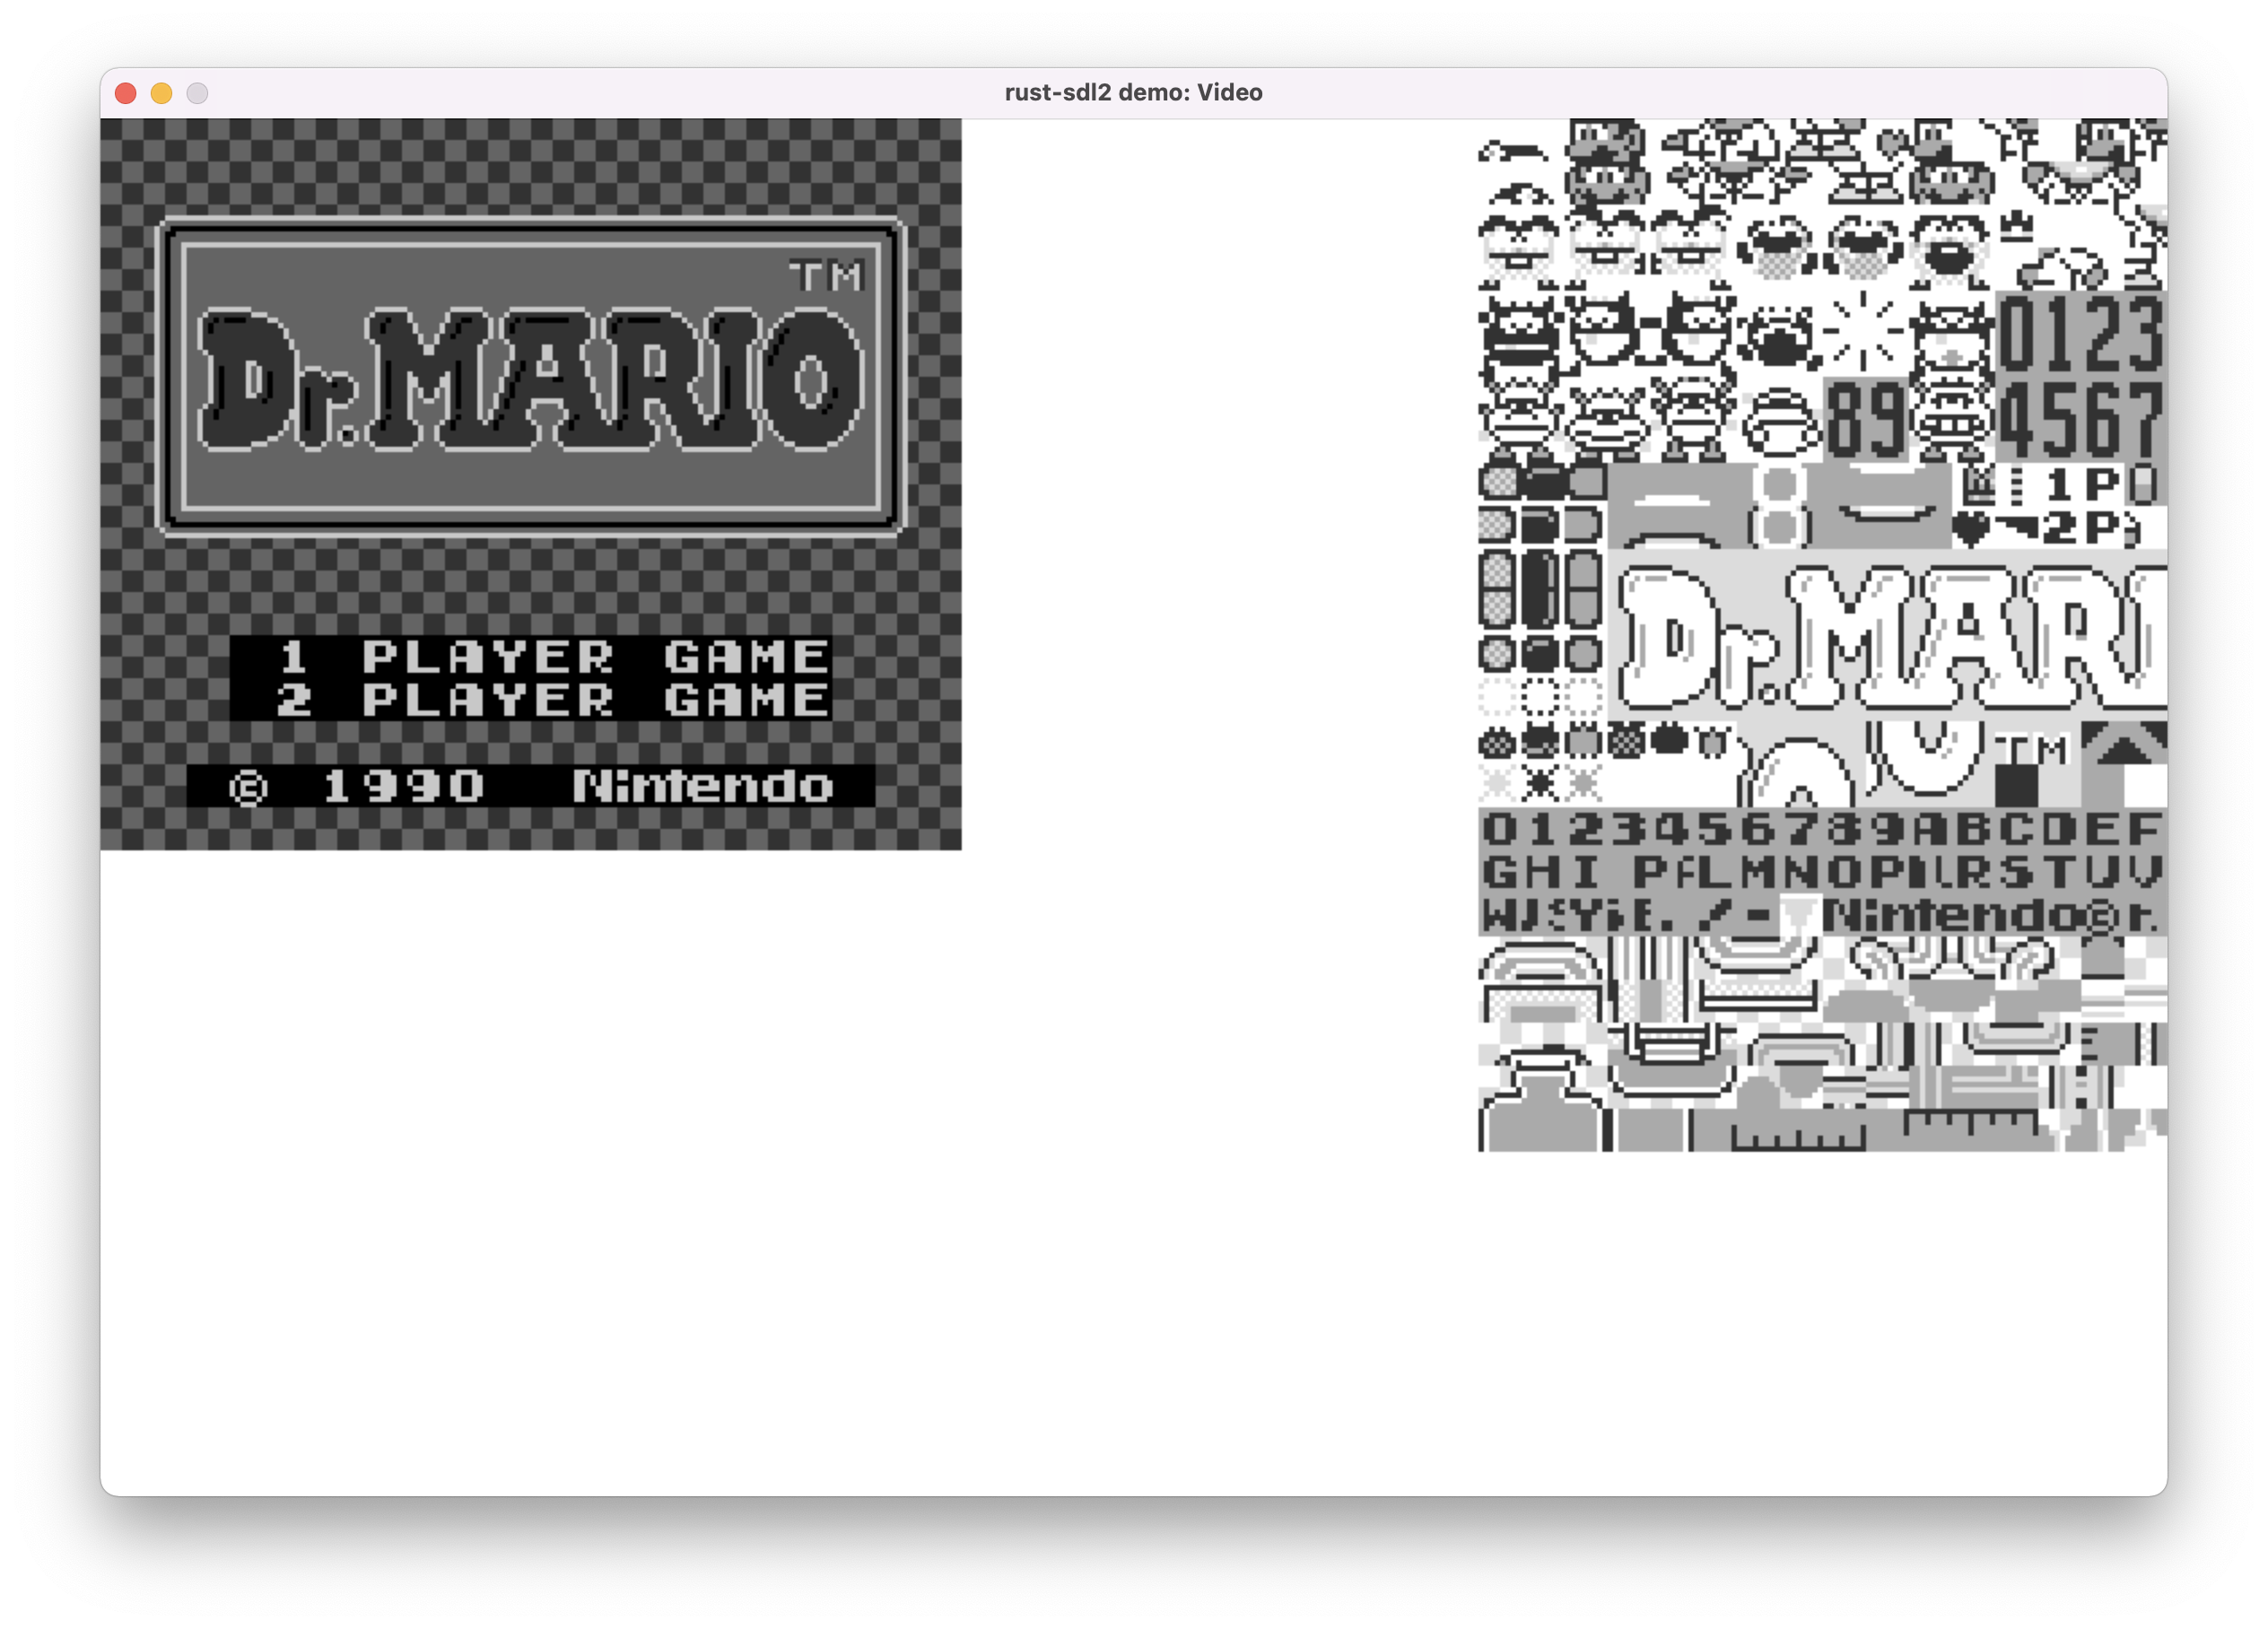
After a few weeks of work I’ve been able to get Tetris to boot and play. I can also run Dr Mario to enter the play screen but all of the pieces are hidden for some reason.
I’m not going to walk through all of the code I’ve written (it would be both long and boring) but I do want to touch on a few things I’ve learned, suggestions for using Rust better, and tips that will make the process easier for those who come after me. (full code in the repo)
Making an emulator is hard because there are so many pieces that must work together perfectly. If one piece is wrong you may see a failure in an entirely different section of the emulator, making it almost impossible to debug. To address this you need three things:, unit tests, test data, and a debugger.
Unit Tests
I knew building the CPU would be hard, so I started making unit tests. Load up two bytes of memory with an instruction, execute the instruction, check that the registers hold the right values. This worked pretty well for the first few instructions but started to become incredibly repetitive. The GameBoy’s Z80 derived CPU has over 500 op codes, that’s a lot of unit tests, and many of them are very similar. After ten tests I could tell this wouldn’t scale so I took a different approach: building a DSL using Rust enums.
Most instructions are in the pattern of Load, source, destination, or math operation, source, destination. There are many possible combinations, but all of the sources and destinations always a register, an immediate value (meaning it’s in memory right after the instruction), or somewhere in memory pointed to by a value in a register. Knowing this pattern I created a series of Rust enums for the different possible sources, destinations, and operations, which I can assemble into every pattern I need, almost like a DSL (domain specific language).
Let’s look at an example. Op code 6A loads the contents of register D into register C. I started with a match statement of every opcode.
0x006A => {
   let v = cpu.get_reg_D()
     cpu.set_reg_L(v)
   cpu.pc += 1;
}
This is easy to understand but when the next instruction comes along that is the same, but with register B instead of D, we will start to see a lot of repetitive code. Next I created enums for the different registers so I could load them like this:
0x006A => {
  let v = cpu.get_reg(Reg8::D())
  cpu.set_reg(Reg8::L(),v);
  cpu.pc += 1;
}
This works but doesn’t really shorten things and doesn’t help me when I come to an instruction that wants an immediate value instead of a register. Eventually I realized that any 8 bit source and destination was interchangeable, so I could use a register enum or one representing an immediate 8 bit value like this:
0x006A => {
  let v = get_source(Source::SrcR8(Imm8())
  cpu.set_reg(Dest::DstR8(Reg8:L());
  cpu.pc += 1;
}
Since most load operations take the same number of cycles and move the PC (program counter) the same amount, I could condense it all into a DSL like this:
op_table.load8(0x6A, DstR8(L), SrcR8(D));
op_table.load8(0x6B, DstR8(L), SrcR8(E));
op_table.load8(0x16, DstR8(D), Im8());
Each call to load8 creates an entry in the op table with all of the information needed to perform each instruction. The actual code is then a match on the enums instead of opcodes, of which there are far fewer, so the code is far smaller.
The implementation for all load ops now looks like this.
match op {
  Load8(dst,src) => {
   let val = src.get_value();
   dst.set_value(val);
  }
  cpu.pc += op.len
}
A side benefit of using enums for everything is that we can add extra methods on the enums for debugging and pretty printing assembly code, which is critical for the next part:
You’ll have to write a debugger
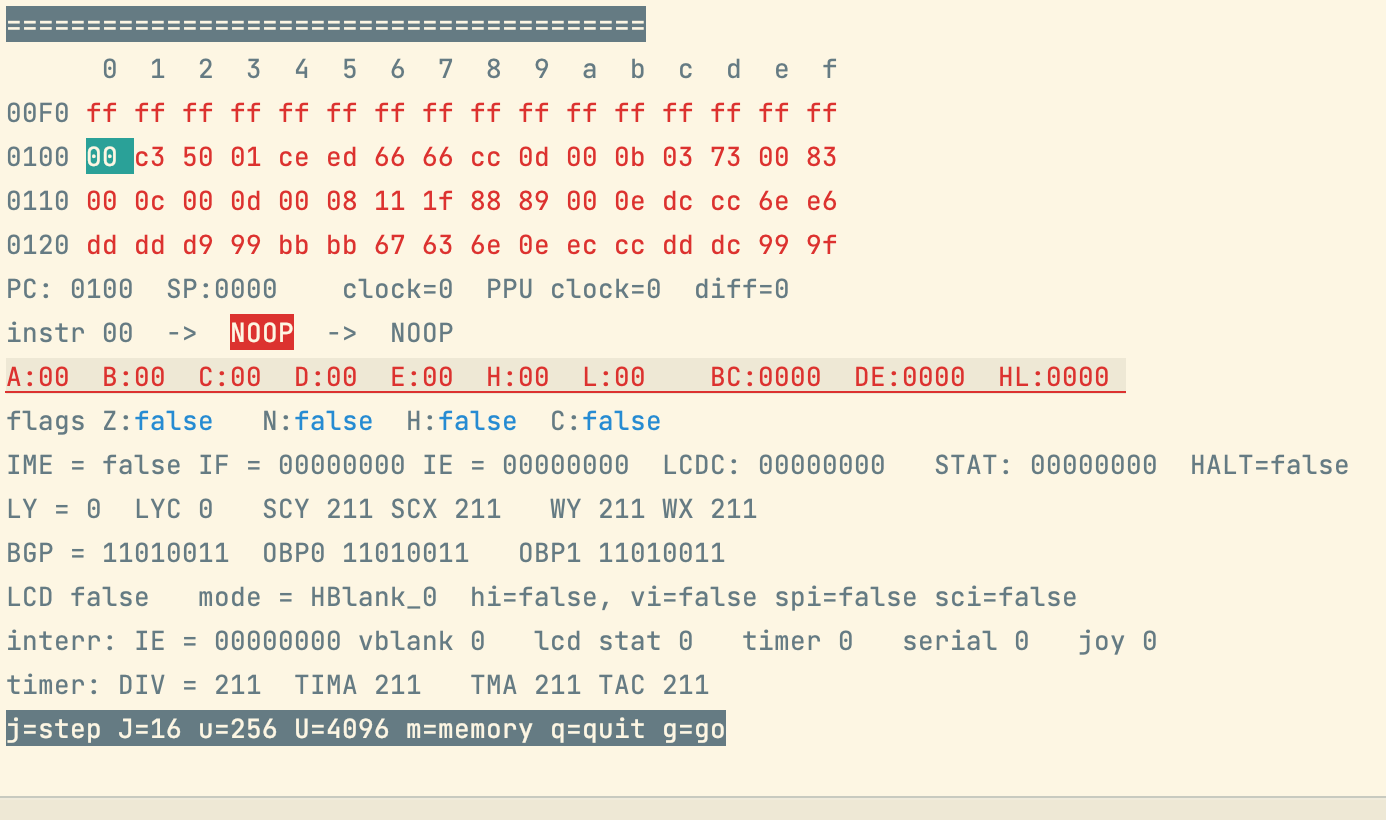
Yep. It's true. As you debug your emulator you’ll find yourself trying to print each step the CPU goes through to find the errors. Load instruction, Load memory, Add, store memory, etc. Over and over again. Eventually it will be too much for println debugging. You’ll have to write a debugger. Fun!.
I created an interactive debugger using the console Rust crate. It lets you write command line programs that take single key text input. I built a simple program to wait for a keystroke, then execute the next instruction and print out the current registers. If I press certain keystrokes it will execute 16 instructions ahead, or an unlimited number unit it hits the next VBlank (vertical blank).
As development went along I ended up adding more and more features to the debugger, including dumping VRAM to a PNG so I could see sprites, viewing the current status of the hardware registers, and running until particular interrupts are hit. Without a debugger it would have taken me many times longer to even get Tetris working.
Test ROMs
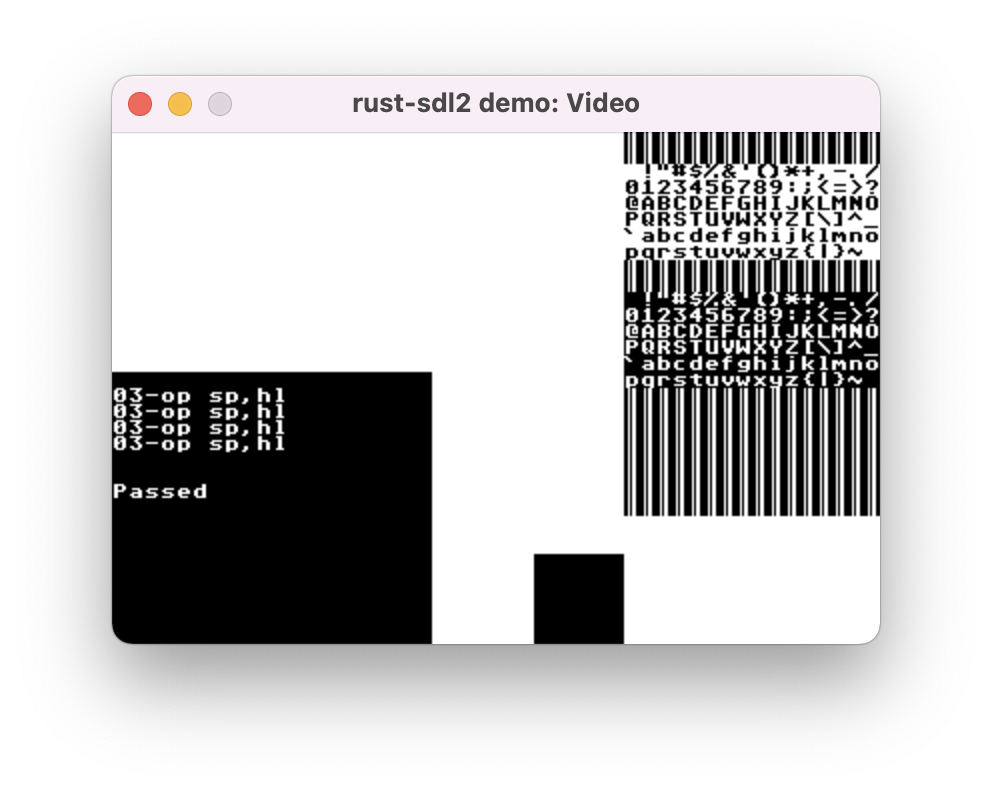
Once you have a debugger and your basic emulator up and running you’ll want to try running actual gameboy programs. I do not recommend trying to run a full game like Pokemon or Zelda. They are too big and you’ll never figure out where it fails. Remember you are emulating a CPU that does hundreds of thousands of operations a second. Full games are too much. Instead start with Tetris or Dr Mario since they were some of the simplest and earliest games written and don’t use memory bank switching or complex interrupts. Even better, try some test ROMs specifically designed for verifying your emulator works.
I started with the CPU instruction ROMs by Blargg The main rom requires memory banking, but the individual tests do not. Each test rom will print results to the screen, and also to the serial port, so it’s easy to see where it fails. Even once you get Tetris running these roms are still helpful because they exhaustively test every op code, even the ones that are rarely used.
That’s it for today. Have an 8bit week!